How to Wipe Files on Windows 11 Securely? – 100% Working Solution!

Summary: Do you want to know how to completely delete or wipe files from your Windows 11 system? In this article, we’ve explored how to wipe files on Windows 11 on Windows 11 securely so that they can’t be recovered afterward. We’ve also covered a trustworthy file eraser software that works with Windows 11 to completely delete files.
The fact that files on a Windows system aren’t actually deleted when they are simply deleted is now widely known. Unless erased, file traces persist on the device even if you delete data bypassing the Recycle Bin or empty the Recycle Bin folder. With the help of data recovery software, these files can be recovered. Therefore, read this article to learn how to securely and completely delete confidential information on a Windows 11 machine so that you can be assured that no one will be able to access or retrieve the files.
What Is File Erasure & Its Importance?
The process of permanently removing files is called file erasure. Additionally, folders, partitions, applications, internet cache, and other data traces on a storage device can be safely and permanently erased using BitVare Disk Wipe Software. When a file is erased, the data is replaced with binary 1s and 0s or a pseudorandom character. With this technique, even in a lab environment, it is impossible to recover the deleted data. Drive Erasure and File Erasure can occasionally be mistaken. The latter removes all data from the drive, including the operating system, and leaves nothing behind (OS). However, in the former, the OS is unaffected while files, directories, and apps are deleted.
Understanding the privacy and security dangers connected to dark data, data at rest, ROT (Redundant Obsolete Trivial) data, or residual data on storage devices can help determine the significance of securely wiping information. When devices are sold or otherwise disposed of, these hazards apply to both live data and data at rest.
Permanently Erase Files on Windows 11 Using the Best Disk Wipe Software
You can use file eraser software, like BitVare Data Wipe, to selectively and permanently delete files on a Windows 11 machine. By overwriting the chosen files, directories, etc. with random data, the software safely deletes them, effectively erasing all possibility of recovery. You can do things like delete data, files, folders, program traces, and more. Additionally, the program features a “Filters” option that enables you to plan the data-erasing procedure to suit your schedule.
Here’s how to use Data Eraser Software to delete certain files or directories on Windows 11.
#Step1. Download and install the software on your Windows PC.
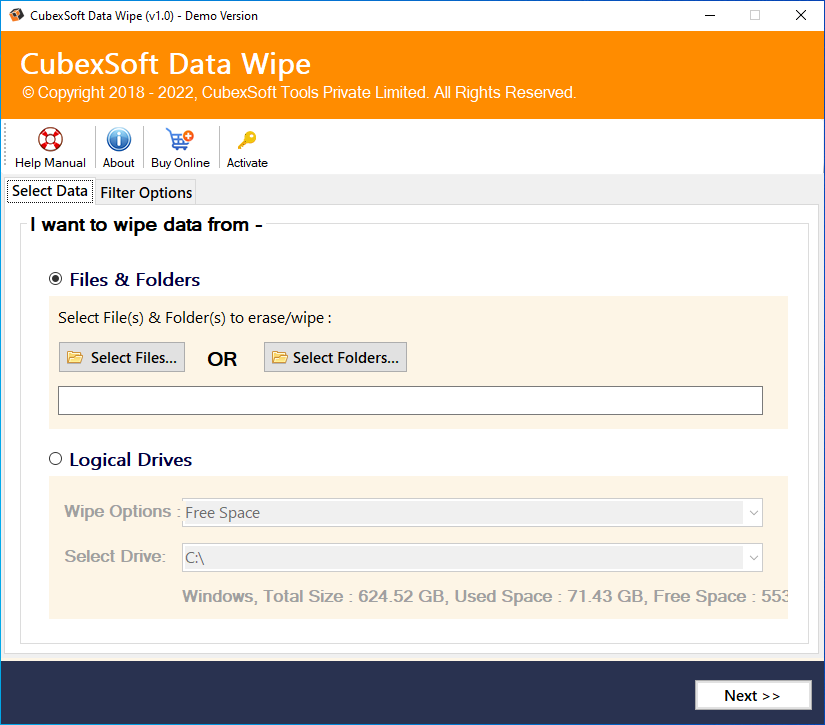
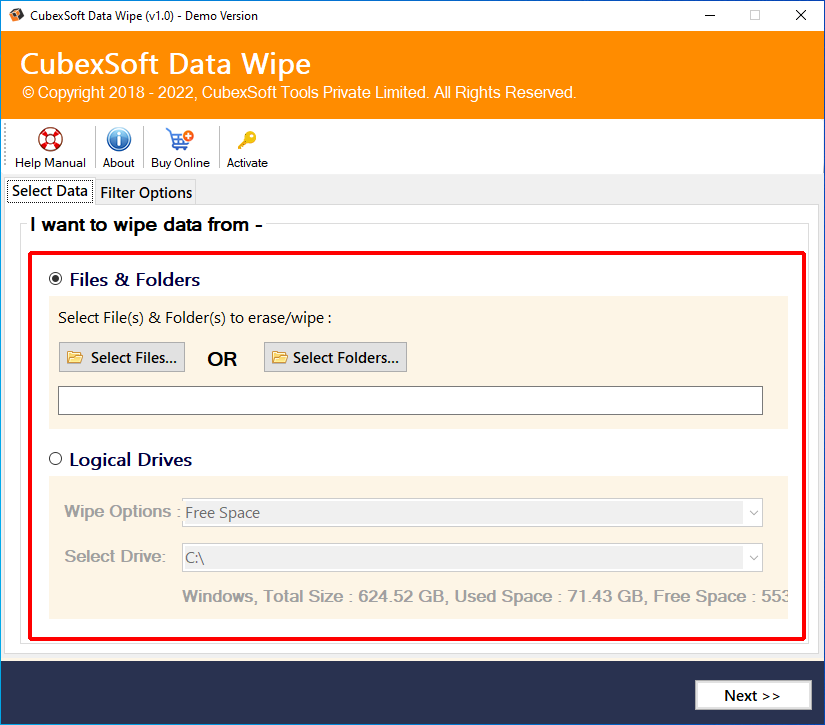
#Step2. Go to the Select Files or Select Folders options to load the necessary data on the software that is required to be wiped from Windows 11 completely. Also, Select the Logical Drive, select the drive you want to erase, and then click Next.
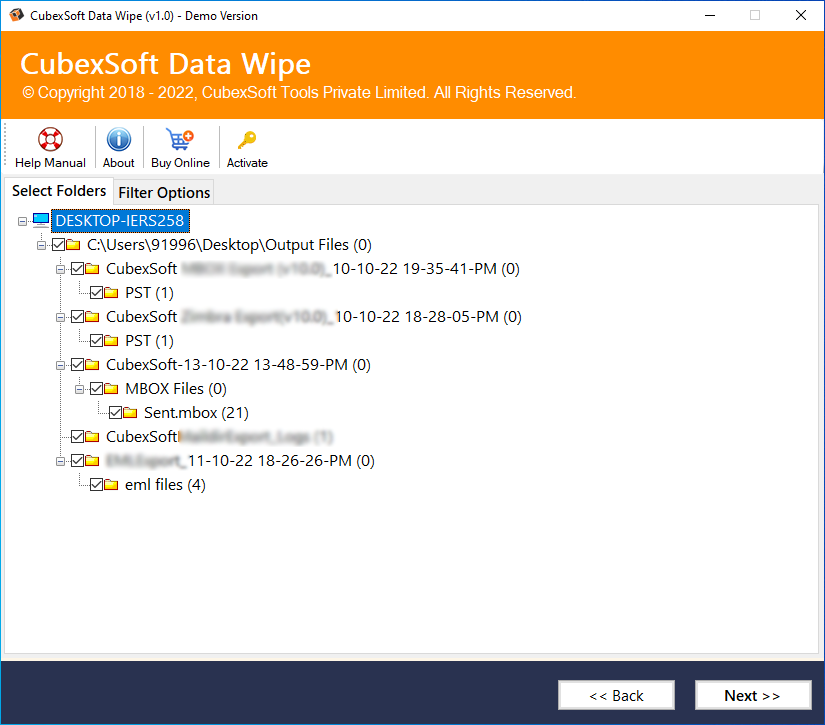
#Step3. The software loads the selected files as a list when the software has scanned them. By clicking Next, you can proceed after double-checking them.
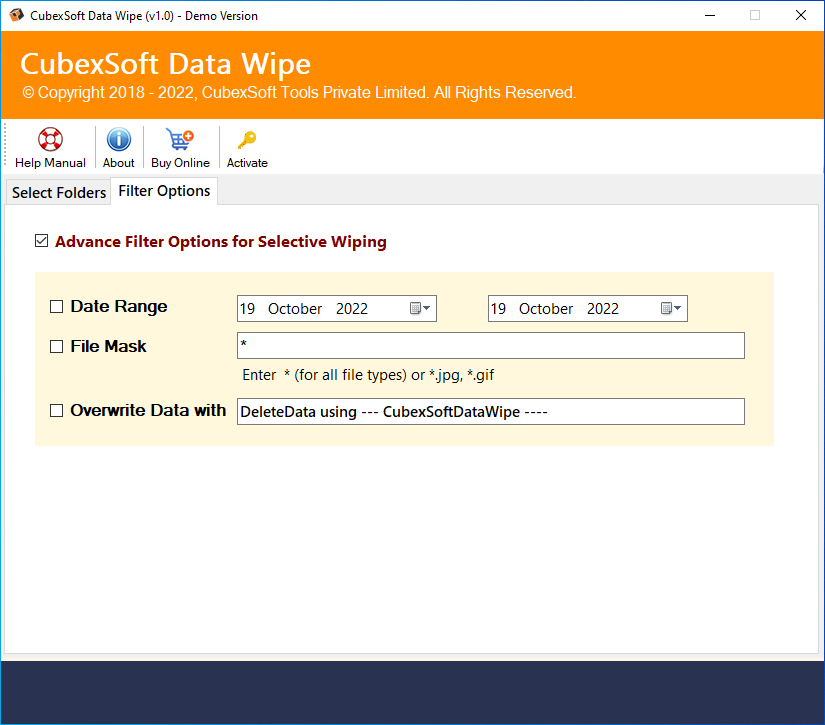
#Step4. Now, applying Filters Options like date range, file mask, or overwrite data with these options will help you in erasing the desired files.
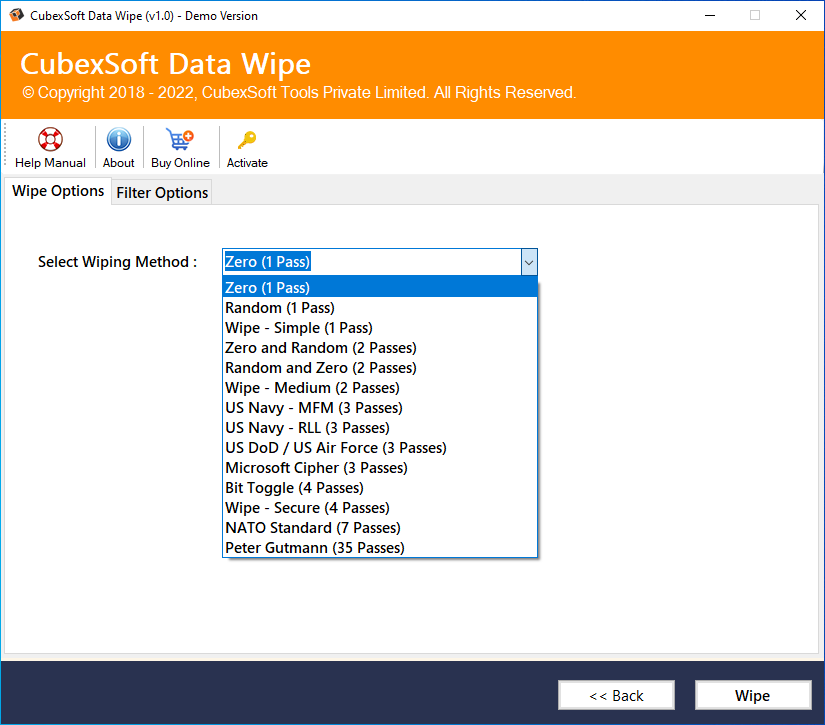
#Step5. Click the drop-down arrow that appears in front of the wiping methods to select one of them. The menu will include options such as Zero (1 Pass), Random (1 Pass), Wipe-Simple (1 Pass), and others. Click Wipe after deciding on the preferred wiping technique.
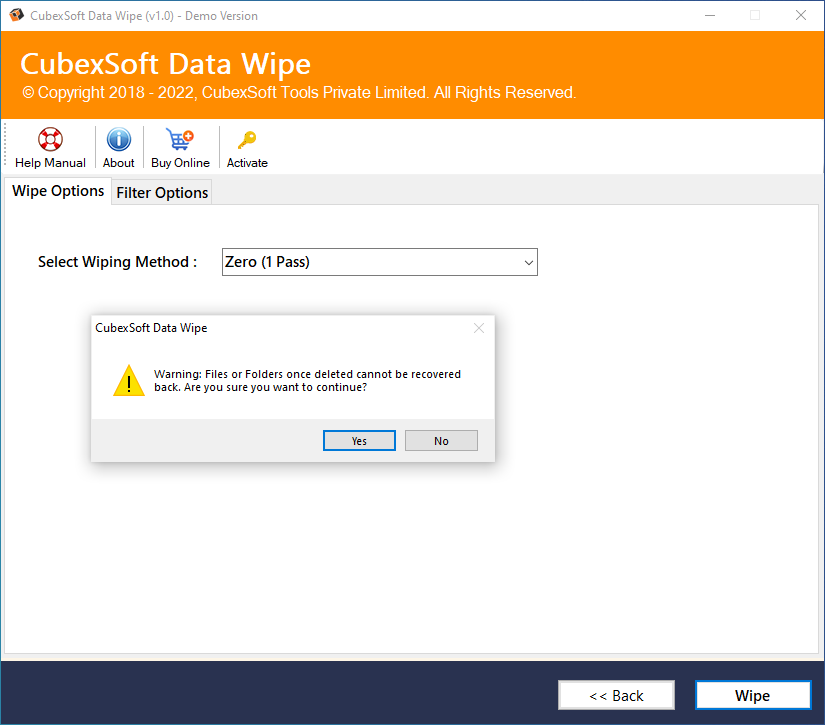
#Step6. An alert box will now open up and request your confirmation. If you want to proceed with the wiping operation, select the yes option.
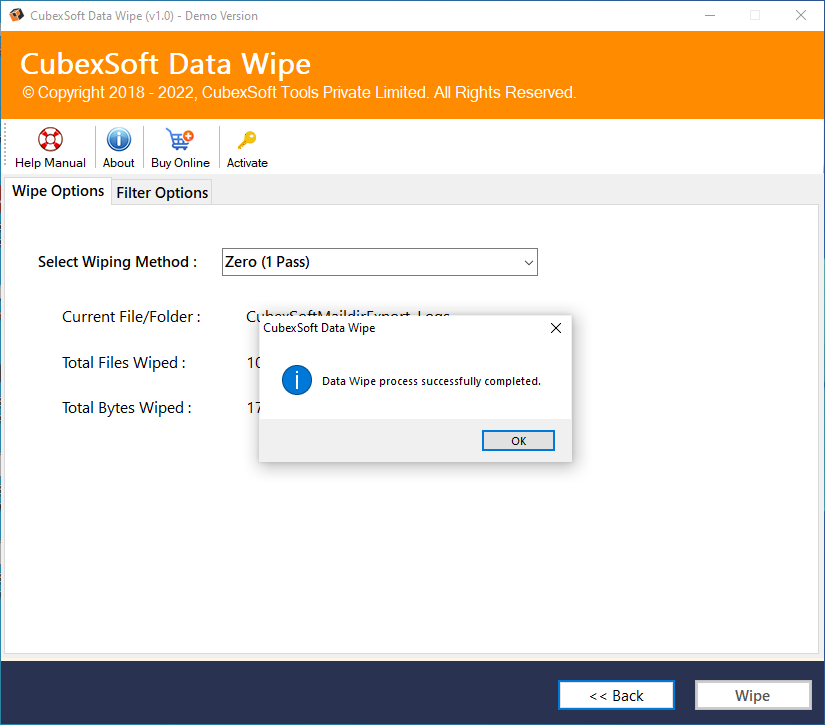
#Step7. Users will see the notification “Data Wipe Process Successfully Completed” once the app has finished wiping everything. Click OK to finish.
Software’s Helpful Features to Wipe/Erase Files Securely
- This application enables users to delete data using a variety of wiping methods, including Zero and Random (2 passes), Random and Zero (2 passes), Wipe File – Simple (1 pass), and Zero and Random (2 passes).
- This solution has the ability to permanently remove sensitive data from a variety of storage media, including a hard disk, memory card, and pen drive.
- Depending on their preferences, users can choose a specific set of files, folders, or even a full disk.
- The software was fully compatible with all Windows Operating Systems, including Windows 11, Windows 10, Windows 8.1, Windows 8, Windows 7, Windows Vista, and Windows XP.
- With the help of wipe options, a user can quickly and easily remove all of their computer’s data with a single click, (Total Space- All data will be erased).
Manual Method to Delete Files on Windows 11
In Windows 11, you can choose to delete everything on a drive or just the empty space. In order to assure that the data cannot be recovered in any way, it is entirely erased by being overwritten with zeroes. Windows 11 does not offer the option to delete specific particular files or directories. You need to utilise a reliable Data Destruction software to selectively remove the files, directories, and other data.
In the sections below, we’ll go through the specific steps for erasing specific files and folders with Windows’ built-in options.
Method 1. Erase Complete Drives by Windows 11 inbuilt Options
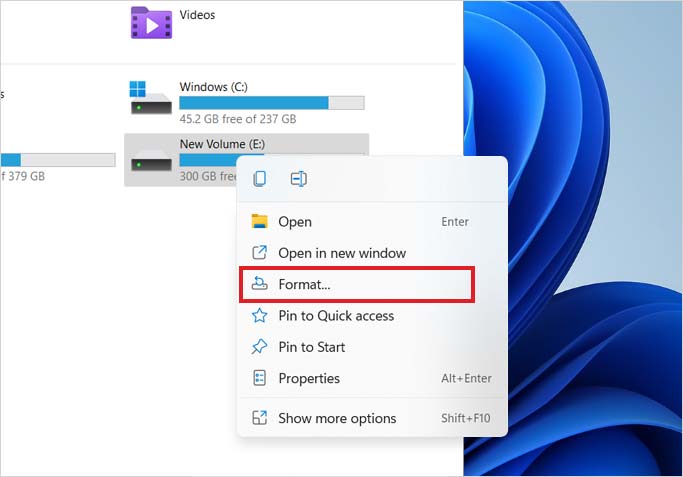
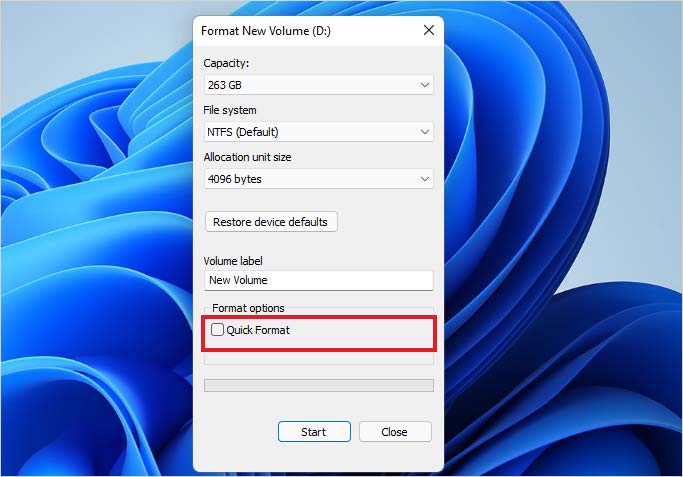
According to the Microsoft Document, when a complete format is performed, the layout command replaces the existing data on a drive with zeroes. However, the Quick format is not supported by this. Follow the instructions listed below to completely delete an internal drive, an external drive, or a USB drive:
- From the Start Menu, open File Explorer.
- Find the drive that has to be deleted.
- Select Format with a right-click on the drive.
- Uncheck the Quick Format box under “Format Options.”
- To fully wipe the selected drive, click Start.
Other options are also accessible for you to choose from, such as the file system format, etc.
Important Note: There is no turning back once you click the Start button. There is no way to recover the deleted data. So, before erasing the drive, double-check. Take a backup if you have any sensitive information you don’t want to lose.
Method 2. Erase Free Space on Windows 11
It is better to clean the free space left by deleted data since you are aware that deleted files can be recovered. To wipe the empty area, utilise the Windows Terminal option. These are the steps:
- Type Windows Terminal in the Start Menu.
- Activate the Windows Terminal. Alternatively, you can choose Windows Terminal (admin) by clicking Windows + X.
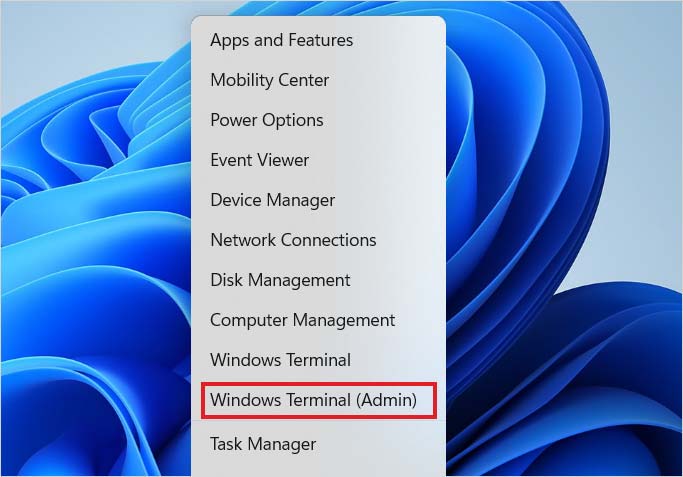
- Replace X with the letter of the drive you want to wipe for free space when inserting the command cypher /w:X:
- Enter the key. The Windows Terminal window will update to display the progress of the command.
The command will take a while to execute depending on the amount of free space and system setup. Once finished, the entire drive’s empty space will be safely erased.
Conclusion
The post covered a technique for wiping a Windows 11 machine before selling it. Every Windows user who is switching from their old system to a new one will find this to be a very sensitive subject. Users occasionally neglect to completely clean the system, and as a result, they subsequently have to cope with unfavorable effects. In order to help any Windows user who is looking for advice on how to wipe files on Windows 11 before selling it to strangers, we have listed a few ways above.